Peripateticism
Yuens' blog

本地访问远程服务器的Docker容器的Jupyter Notebook
以本地访问远程服务器的Jupyter notebook为例,假设本地是Windows系统使用Xshell连接远程服务器。[toc]
1. 建立本地到远程服务器的隧道
因为本地是Windows系统,使用Xshell客户端进行远程服务器访问,先在Xshell里的该访问的属性,并设置隧道:
 这里设定隧道的端口号本地与远程服务器相同,均为9898。
2. 启动远程服务器的Docker镜像
假设镜像是bvlc/caffe:cpu,用如下命令启动镜像:
docker run -v /home/yuanshuai/:/home/yuanshuai -p 127.0.0.1:9898:8888 -tdi bvlc/caffe:cpu
考虑到容器里的jupyter notebook的默认端口号是8888,而本地隧道建立的端口号是9898,所以创建容器时,指定端口为:127.0.0.1:9898:8888。
3. 进入容器并安装Jupyter Notebook
假设刚刚启动容器后得到的容器ID是4522开头,那么就进入容器:
docker attach 4522
然后在容器里安装Jupyter Notebook:
pip install "ipython[all]"
选择工作路径后,启动Jupyter nobook:
jupyter notebook --ip=0.0.0.0 --allow-root
得到下面的启动信息:
root@4522978edc03:/workspace# jupyter notebook --ip=0.0.0.0 --allow-root
[I 02:36:32.320 NotebookApp] Writing notebook server cookie secret to /root/.local/share/jupyter/runtime/notebook_cookie_secret
[I 02:36:32.653 NotebookApp] Serving notebooks from local directory: /workspace
[I 02:36:32.653 NotebookApp] 0 active kernels
[I 02:36:32.653 NotebookApp] The Jupyter Notebook is running at:
[I 02:36:32.653 NotebookApp] http://0.0.0.0:8888/?token=e2a79096646e63b7154bed34137d54fdf43654cca78793f5
[I 02:36:32.653 NotebookApp] Use Control-C to stop this server and shut down all kernels (twice to skip confirmation).
[W 02:36:32.653 NotebookApp] No web browser found: could not locate runnable browser.
[C 02:36:32.653 NotebookApp]

    Copy/paste this URL into your browser when you connect for the first time,
    to login with a token:
        http://0.0.0.0:8888/?token=e2a79096646e63b7154bed34137d54fdf43654cca78793f5
4. 本地访问远端Jupyter Notebook
在本地浏览器打开http://127.0.0.1:9898,ip地址为127.0.0.1表示localhost,然后端口号用在第一步中指定的local本地的端口号,即9898,然后回车:
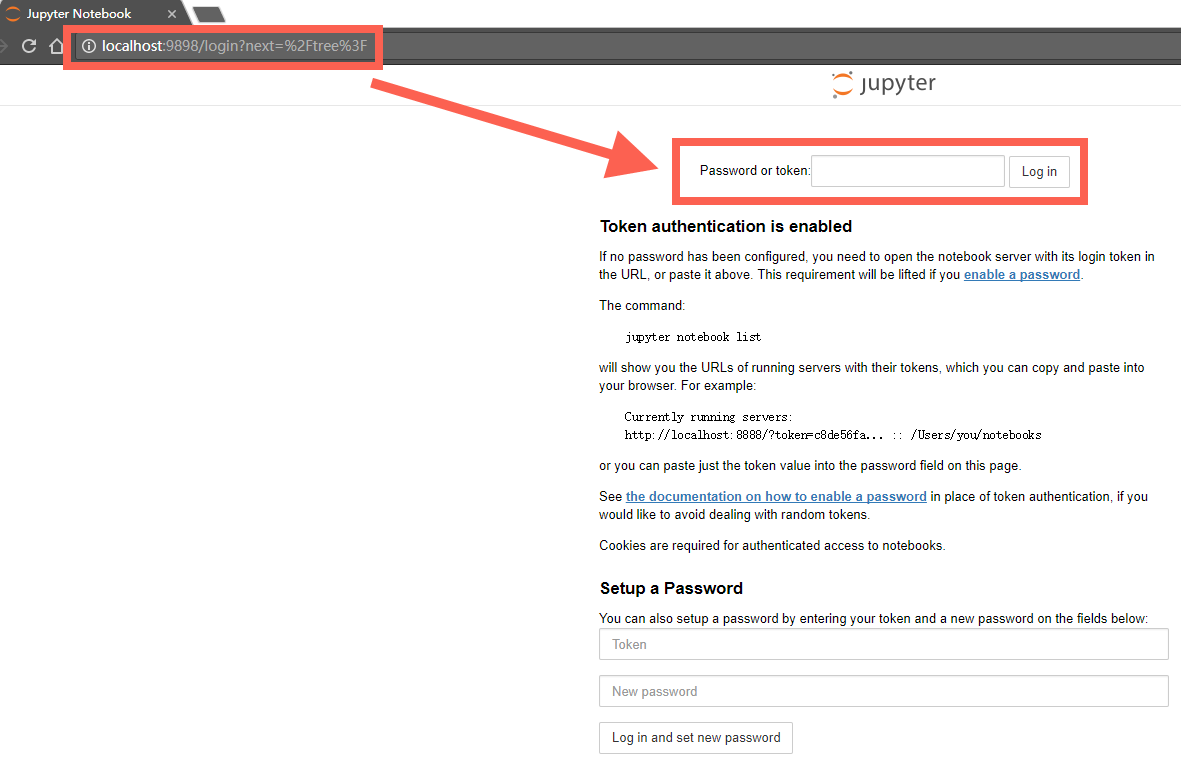
将第三步中启动jupyter notebook得到的token复制粘贴到上面的红框中,即可成功!